
Supercharge your Mac terminal with Oh My ZSH
Published on Aug 15, 2019
The z-shell (or zsh) is a feature-rich alternative to the bash shell that most Mac and Linux developers are familiar with. In addition to providing a bunch of extra functionality, it also offers an easy way to customize and theme your terminal to your liking.
Here’s a taste of what you can expect: 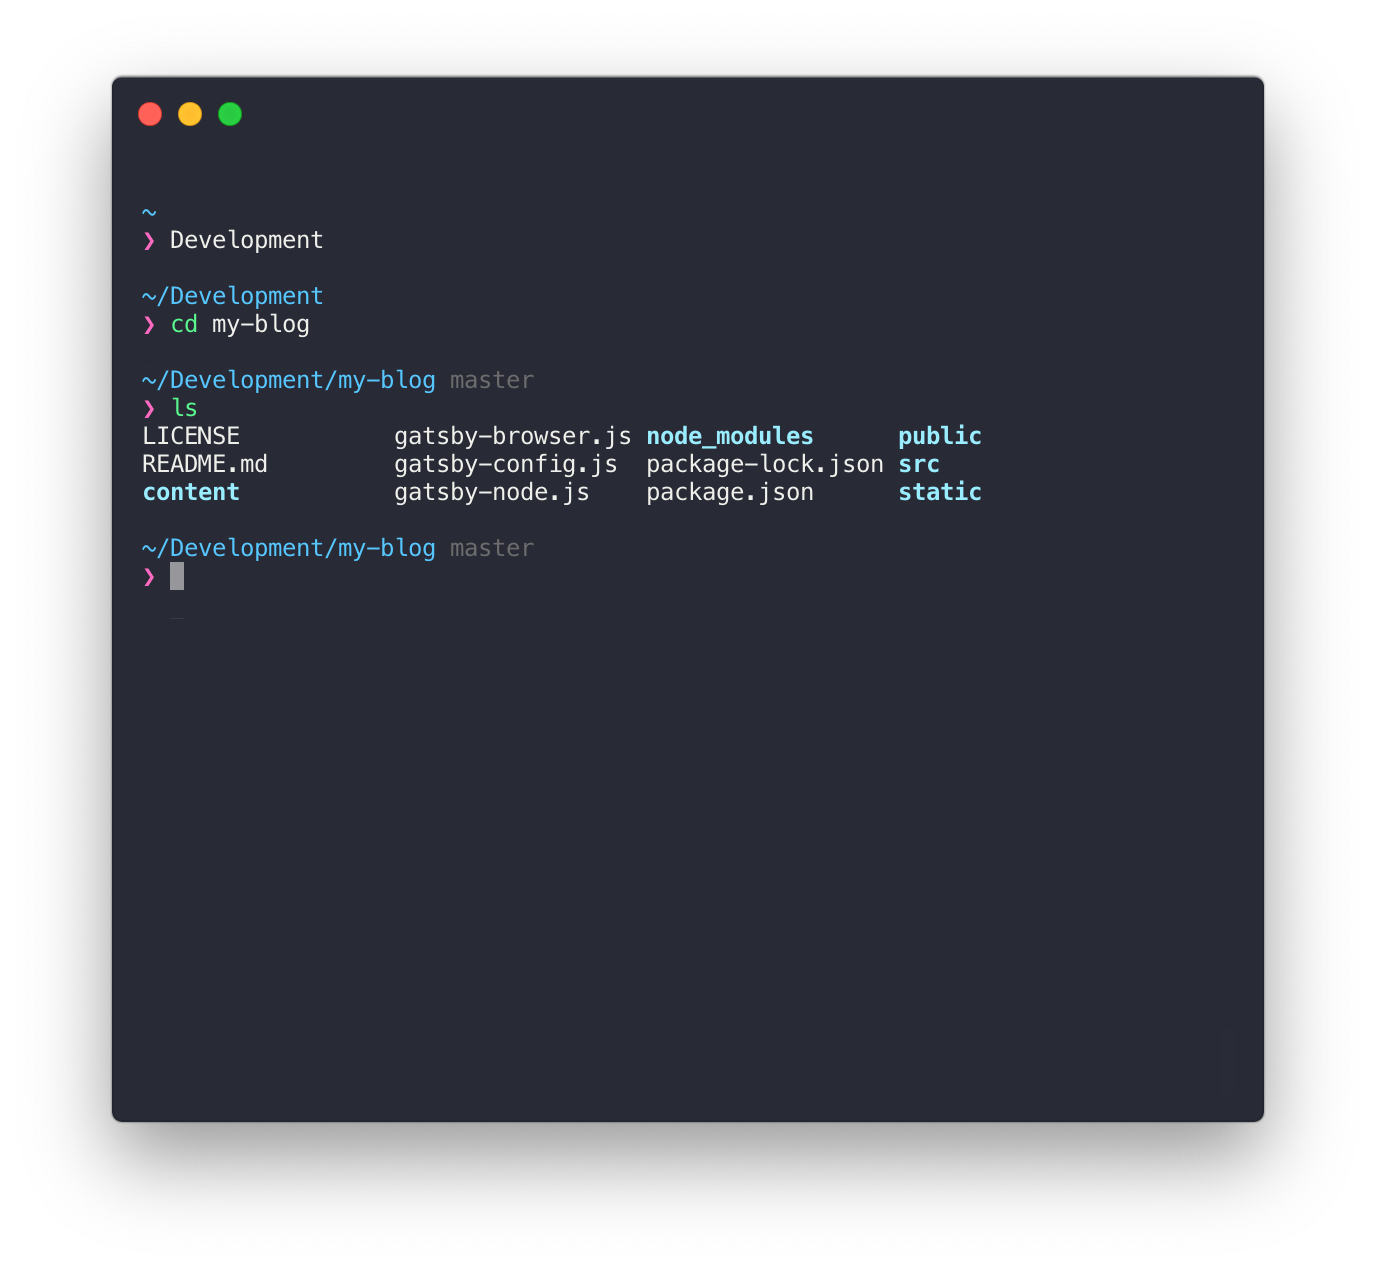
- Improved TAB autocompletion for commands, files, and directories
- Auto-correction for misspelled commands, files, or directories
- Theming and enhanced colors make debugging in the terminal much easier on the eyes
- Improved command history - start typing the first few letters of a command, then press up to find that command in your history, filtering out any commands that don’t start with those letters
Before we get started, we’ll need to have Homebrew installed. Homebrew is a package manager for macOS, similar to apt for Linux systems. It simplifies the installation of many software packages by automatically installing any dependencies and managing PATH variables.
Other prerequisites include having npm and git installed.
Homebrew
Open your terminal and run this command:
/usr/bin/ruby -e "$(curl -fsSL https://raw.githubusercontent.com/Homebrew/install/master/install)"Improved Terminal App
To unlock the full theming capabilities of zsh, you will need an upgrade from the default MacOS Terminal app. Here are two popular choices: iTerm2 and Hyper.
If you intend to do a significant amount of work in the terminal or edit a lot of text files using the terminal, I recommend going with iTerm2. It’s lighter weight and has some nicer features for power users.
Find the iTerm2 installation guide here: iTerm2 - macOS Terminal Replacement
Hyper is my app of choice, though. It looks absolutely fantastic and provides some useful improvements, including an enhanced right-click menu, better split tabs, and improved copy-paste functionality.
Download HyperJS from Hyper™
Installing the z-shell
Now that we have Homebrew set up, we can install the z-shell with this simple command:
brew install zsh zsh-completionsNext, we need to set zsh as our default shell:
chsh -s /bin/zshTo test your installation, restart your terminal and run zsh --version. Some version details should be displayed below the command.
Oh My ZSH
Oh My ZSH is a framework for managing your z-shell configuration and theming. It’s a very popular GitHub repository with almost 10k stars, so finding support if you ever run into any issues should be a breeze.
Start the installation with this curl command in your terminal:
sh -c "$(curl -fsSL https://raw.githubusercontent.com/robbyrussell/oh-my-zsh/master/tools/install.sh)"Once installed, you may need to restart your terminal to see any changes. For now, the UI changes are minor, but let’s test it out by trying this nifty shortcut.
Previously, to change directories, you would use cd <directory>. ZSH makes cd optional, so now all you need to do is type <directory>.
This is just the tip of the iceberg when it comes to what we can do with our improved shell.
Theming ZSH
ZSH makes it incredibly easy to update the look of your shell. You can find hundreds of community-published themes here or here.
To get my exact look, we need to install the Pure theme. This is done slightly differently than the method described below, but you can get pretty close using just this approach.
Generally, changing the theme is as simple as modifying one line in the ~/.zshrc file. By default, the theme is set to robbyrussel.
You can change it by navigating to your home directory with:
cd ~Then, open the .zshrc file. If you’re comfortable editing it directly in your terminal, you can use vim. Otherwise, open the directory in Finder with:
open .Open the .zshrc file with any text editor. By default, the .zshrc file is hidden. You can view hidden files with this shortcut: Shift (⇧) + Command (⌘) + Period (.)
Now replace this line with the theme of your choice:
ZSH_THEME="<your theme of choice>"Save the file and restart your terminal. If you’ve done everything correctly, you should see your newly themed terminal.
Improved Syntax Highlighting
Syntax highlighting allows the terminal to give you live feedback on the commands you’re typing. Green commands exist, while red ones don’t—it’s pretty much as simple as that. This can be very useful for catching typos or quickly checking if you have certain commands installed.

Enabling syntax highlighting with zsh is another one-liner:
brew install zsh-syntax-highlightingPure Theme
Pure adds some extra functionality as well as a beautifully clean theme. Most of the functionality revolves around providing improved git information. 
To install Pure, first set your ZSH_THEME="" in your ~/.zshrc file (refer to the instructions above for how to do this).
Next, run:
npm install —global pure-promptThen, initialize the prompt system with:
# .zshrc
autoload -U promptinit; promptinit
prompt pure
Restart your terminal, and voila! You should have a sleek theme with improved git integration.